 .
.Basic Operation
Before installing the projector, master the basics of its operation as described below.
-
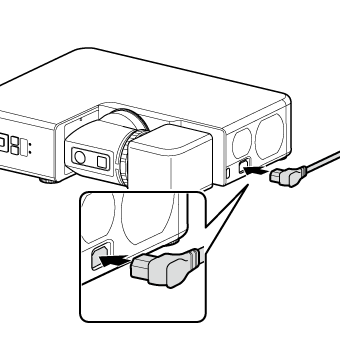
Connect the supplied power cable to the projector and plug it into a power outlet.
The projector will switch to standby mode.
dCAUTION
The supplied power cable is for use exclusively with FP-Z5000 projectors. Do not use it with any other product.
-
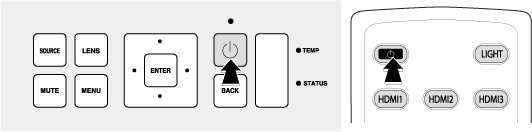
Turn the projector on by pressing the power button on the control panel or remote control.
dCAUTION
Do not look directly into the lens while the projector is on.
bTIP
The projector takes about 20 seconds to start after the power button is pressed. Wait until the indicator lamp turns from amber to white and the latch release button lights.
-
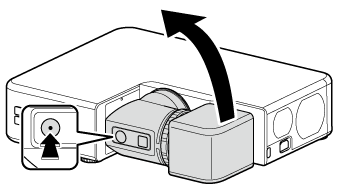
Press the arm latch release to release the latch and then rotate the arm into position.
-
Press the arm latch release to re-enage the arm latch.
-
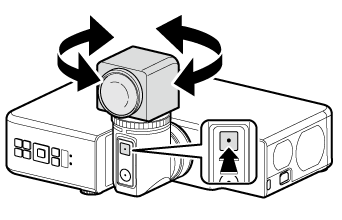
Press the head latch release to release the latch and then rotate the head into position.
-
Press the head latch release to re-engage the head latch.
dCAUTIONS
- Some portions of the projected image may not be visible depending on lens shift and the orientation of the lens.
- When rotating the lens, keep it supported and rotate it slowly.
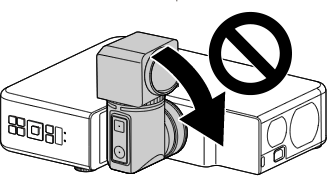
-
To protect the lens, the arm locks to prevent it rotating in the direction shown when the projector head is oriented as shown in the illustration.
bTIPS
- The latches will re-engage automatically if not manually re-engaged within 10 seconds.
- The LED lights when the head latch release is pressed.
- The arm can each be rotated 90° to either side.
- The head can be rotated 360° in 90° increments.
-
Remove the lens cap.
-
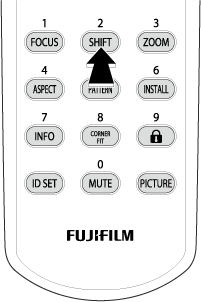
Press and hold the “2” button on the remote control to center the lens.
-
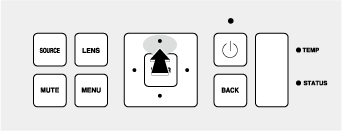
Press the selector up to cycle through settings in the following order until you reach the desired installation type: Front Table, Rear Table, Rear Ceiling, and Front Ceiling. More information on choosing an installation type is available here.
Switching to Standby
Pressing the power button while the projector is on displays a confirmation dialog. Press the button again to switch the projector to standby. The cooling fan will turn off a few seconds later.

dCAUTION
The lens latches cannot be released while the projector is on standby; check the position of the lens and replace the lens cap before switching the projector to standby.
bTIPS
- The projector automatically switches to standby when the lens is in the storage position.
- The power indicator lamp lights amber when the projector is in standby mode.