 .
.Installation
- Choosing a Location
- Horizontal Orientation
- Vertical Orientation
- Ceiling Installations
- Other Installations
Choosing a Location
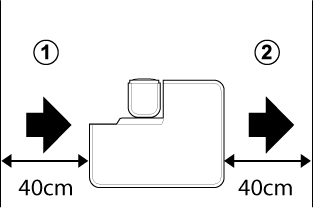
When installing the projector, choose a location where the vents will be a safe distance from walls or other obstructions.
A Intake : 40 cm (1.3 ft)
B Exhaust : 40 cm (1.3 ft)
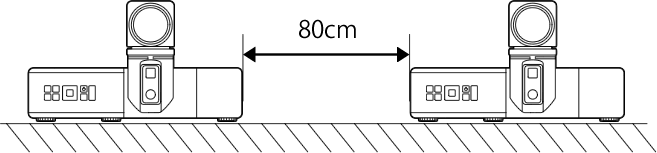
When installing two or more projectors side-by-side, leave a space of at least 80 cm (2.6 ft) between them. You will also need to ensure that the warm air from the exhaust vents does not enter any of the projectors' intake vents.
dCAUTION
Do not obstruct the vents. The build-up of heat inside the projector could cause fire.
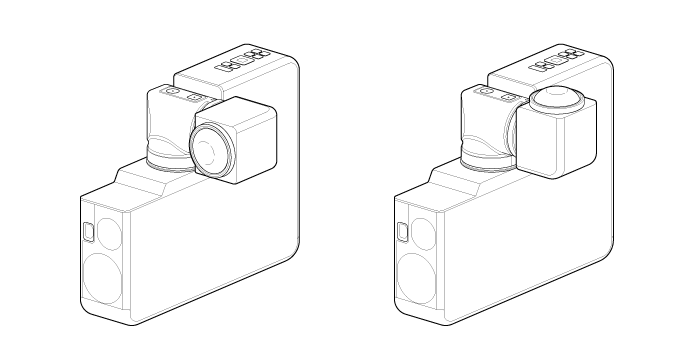
Horizontal Orientation
Normally, the projector will be installed and used in horizontal orientation.

bTIP
In horizontal orientation, the height of the projector can be adjusted using the adjustable feet.
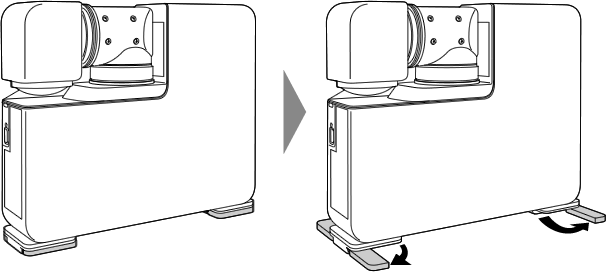
Vertical Orientation
The projector can be used in vertical orientation.
To install the projector in vertical orientation, attach the supplied stands.
-
Screw the stand attachment screws into the attachment holes on the projector (×2).
dCAUTIONS
- When attaching the stands, lay the projector flat.
- The lens should be in the storage position, the projector in standby mode, and the power cable disconnected.
-
Open the legs after standing the projector on edge.
dCAUTIONS
- Be careful not to drop the projector when lifting it to attach the stands.
- Attach the stands securely. When using the stands, be sure the legs are fully open. If the stands are not securely attached or the legs are not fully open when the projector is oriented vertically, the projector could become unbalanced and tip.
- The supplied stand does not incorporate a height-adjustment mechanism.
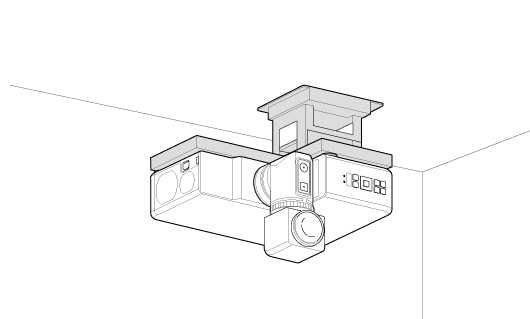
Ceiling Installations
The projector can be suspended from ceilings.
dCAUTIONS
- When suspending the projector from a ceiling, use a ceiling mount. Consult the product retailer for more information.
- Ceiling installations and other tasks requiring specialized skills should only be performed by the retailer or trained technicians.
- After installing the projector, you will also need to install fall preventers or other anti-fall equipment.
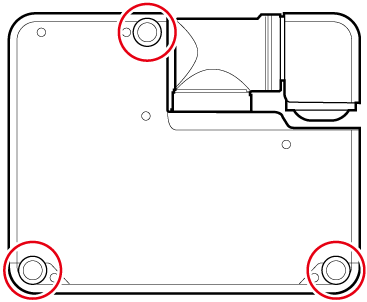
Other Installations
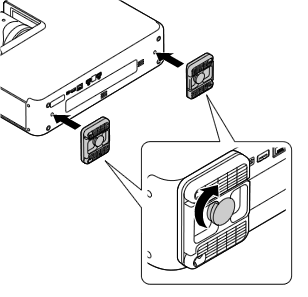
To secure the projector in vertical or horizontal installations without a ceiling mount, attach it to the supporting surface use screws inserted in the holes for the three adjustable feet (see figure).
- Screw diameter: M6
- Depth: 20mm
- Tightening torque: 4.0 ± 0.5N・m
dCAUTIONS
- The moving parts of the lens may contact the mount depending on the lens angle or shift position. This can be prevented by leaving a space of at least 7 mm between the mount and the bottom of the projector. Using a spacer or the like to ensure separation, attach the projector to the mount using the screw holes on the bottom of the projector.
- Do not attach the projector to the mount using the adjustable feet.