
 .
.Web Control
You can use a web browser to monitor the status and control this unit connected to a network.
- About the web control function
- How to Use the Web Control Function
- Functions Available Only Through Web Control
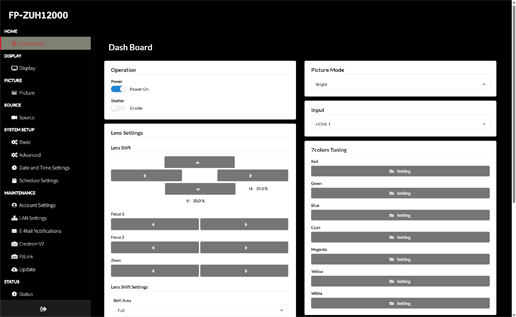
About the web control function
The following operations can be performed from a PC using the web control function.
- Projector Setup and Adjustment
- Backing Up and Restoring Projector Setup Values
- Monitoring Projector Status
- Sending Email During Projector Abnormalities
*An email server is required on a network with which the Projector can communicate to use the email sending function.
How to Use the Web Control Function
Preparing the web control function
To use the web control function, the following settings are required. The PC and projector must also be connected to a network that allows communication.
- Configure the aLAN Settings so that the projector and PC can communicate.
- To use the projector even in standby mode, set aSTANDBY MODE to Communications.
- Enable HTTP in the projector's aLAN Control.
Accessing the Web Control Function
-
In the web browser’s address bar, enter the IP address set on the projector.

-
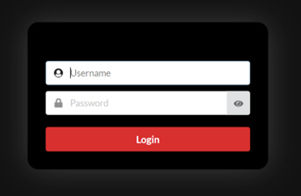
Enter the user name and password on the login screen.
By default, the following two types of user names are set.
There is no password by default. -
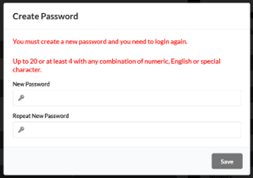
The password setup screen will be displayed when you log in for the first time.
Enter the password you want to set twice and press the SAVE button.
The login screen will be displayed again; enter your user name and the password you have set. -
The web control screen is displayed upon successful login.
| admin | All web control functions are available. |
| user | Basic operations of the web control functions are available. |
d Caution
The set password will be deleted when aSystem Setup: Basic > Reset Settings > Initialization is executed from the menu screen.
Functions Available Only Through Web Control
Uploading Custom EDID
Select Source under SOURCE in the navigation menu.
Select Upload in the EDID Settings and upload the custom EDID file.
b Note
The file to be uploaded must be EDID Block 0/Block 1 (256-byte) data.
Custom EDID can be used by selecting Custom in the EDID Settings of the input menu.
Uploading a custom background color
Select Basic under System Setup in the navigation menu.
Select Upload in Background Color and upload the file.
The uploadable file is a 3840×2400 PNG file.
b Note
The custom background color can be used by selecting Custom in Background Color in the Basic System Setup menu.
Backup and restore settings
In the navigation menu, select Advanced under System Setup.
To back up, select Backup in User Settings and download the settings file.
To restore, select Restore in User Settings and upload the settings file downloaded with Backup.
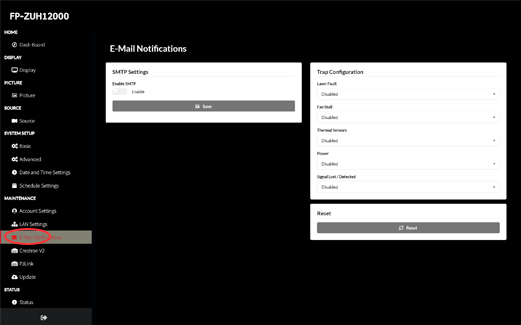
Email Notification Function
In the navigation menu, select E-Mail Notifications under Maintenance.
Enter the required setup values for notification on the screen.
An email server is required on a network the projector can communicate with.
Contact your email server administrator for setup details.
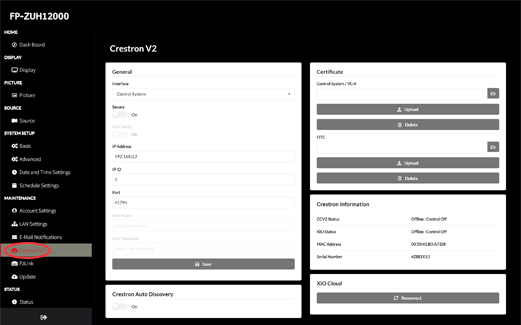
Crestron Connected® settings
In the navigation menu, select Crestron® V2 under Maintenance.
Enter the required setting values.
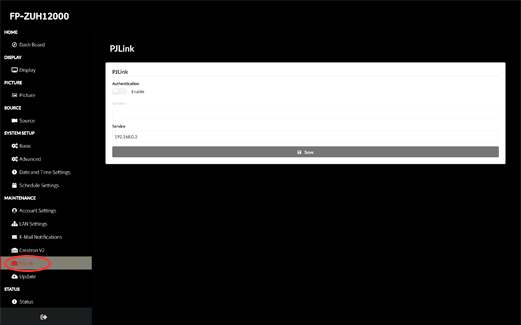
PJLink™ settings
Select PJLink™ under Maintenance in the navigation menu.
Input the required Setup values.
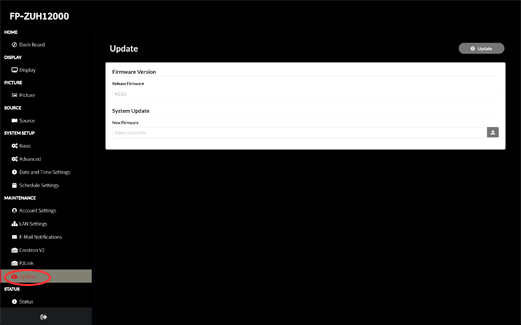
Firmware Update
-
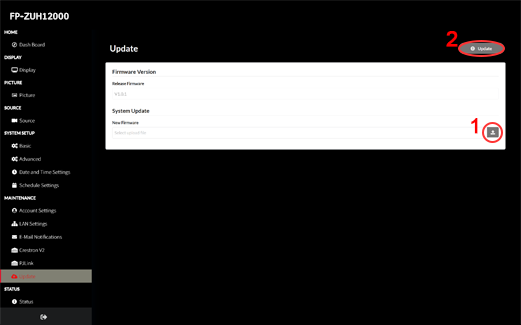
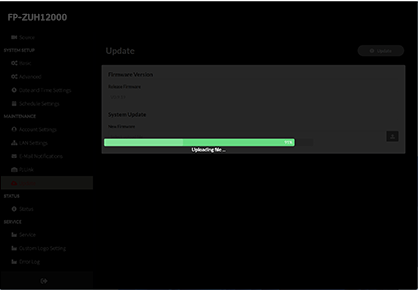
Select Update under Maintenance in the navigation menu.
-
Specify the downloaded firmware file and press the Update button on the top right.
-
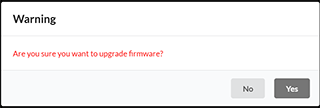
The firmware update confirmation screen will be displayed; press the Yes button.
-
If the firmware update is successful, the Projector will restart automatically.
d Caution
The firmware update takes a maximum of 20 minutes. Do not perform any menu operation while updating the firmware.
Also, never turn off the main unit power supply.