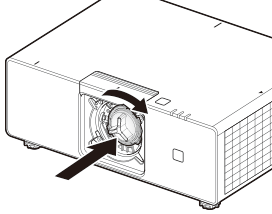
.
.Lens Adapter
Depending on the projection lens used, lens adapter mounting and removal may be required.
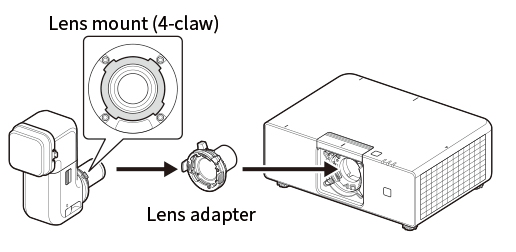
A lens adapter is required for projection lenses that have " " marked on the serial label.

Projection Lenses Requiring a Lens Adapter
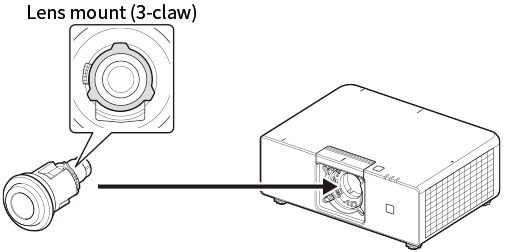
Projection Lenses Not Requiring a Lens Adapter
b Note
The lens adapter is attached to the projector body at the time of shipment.
When using a lens adapter
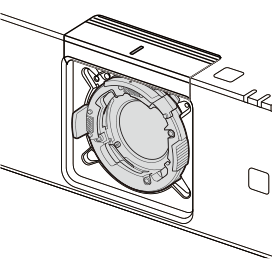
If the lens mounting section appears as shown in the illustration, the lens adapter is already installed.
No installation of the lens adapter is required.
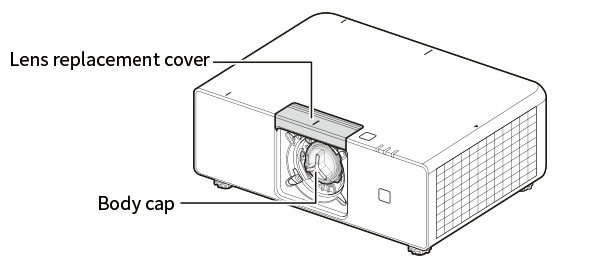
Removing the lens replacement cover and body cap
-
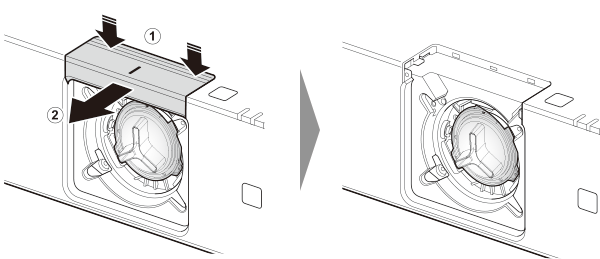
While simultaneously pressing the positions indicated by A on the lens replacement cover, pull the cover in direction B.
-
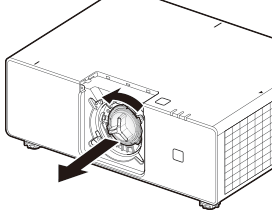
Rotate the body cap counterclockwise to remove it.
Removing the adapter cap
Remove the adapter cap before mounting the lens adapter.
-
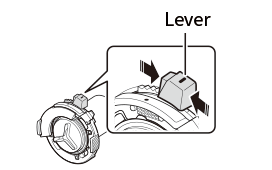
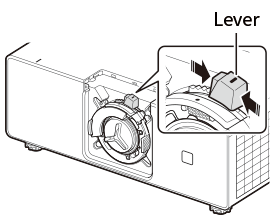
Grasp the lens adapter lever knob from both sides with your fingers.
-
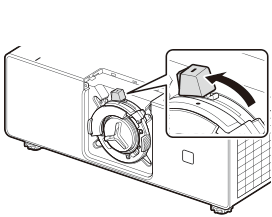
Move the lever in the direction of the arrow until it stops.
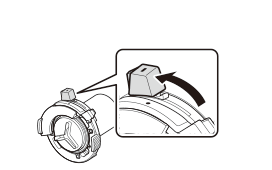
-
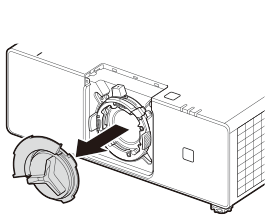
Pull the adapter cap in the direction of the arrow to remove it.
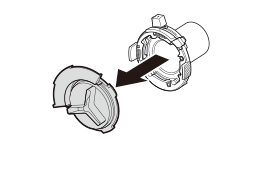
Lens adapter mounting
-
Grasp the lens adapter lever and rotate it clockwise until it stops.
Confirm that the lever is to the right of the center when viewed from the front.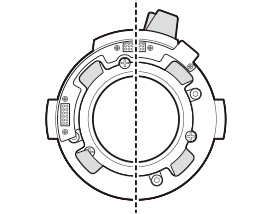
-
Insert the lens adapter. Align the index (red line) on the lens adapter lever knob with the index (red circle) on the projector body.
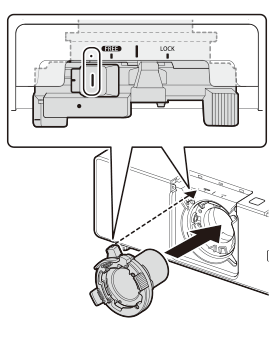
-
Rotate the lens adapter clockwise until it comes to a stop. Rotate the lens adapter lever knob until its index (red line) aligns with the LOCK position on the projector body.
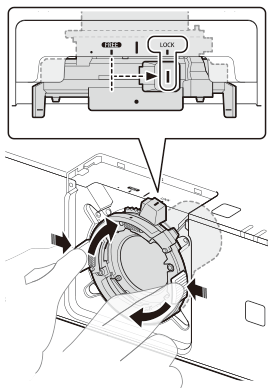
-
Using a screwdriver, tighten the two lens adapter fixing screws shown in the figure by rotating them clockwise.
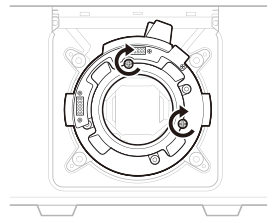
-
Grasp the lens adapter lever knob from both sides with your fingers and move it in the direction of the arrow until it stops.
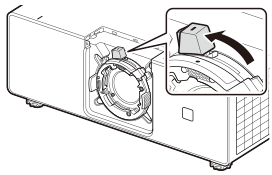
-
Using a screwdriver, tighten the lens adapter fixing screw shown in the figure by rotating it clockwise.
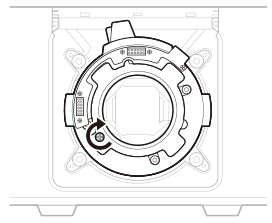
-
If no projection lens is to be installed, attach the adapter cap to prevent dust entry.
To attach the cap, follow the reverse procedure of step a, "Removing the adapter cap."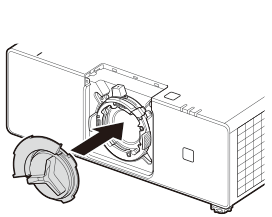
d Caution
The projection lens cannot be mounted unless all three lens adapter fixing screws are tightened; ensure they are tightened securely.
When not using a lens adapter
If the lens mounting section appears as shown in the figure, the lens adapter has already been removed.
The lens adapter attachment/detachment procedure is not required.
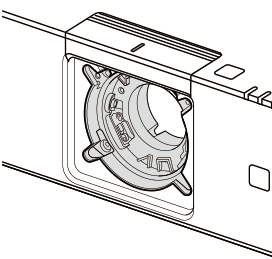
Removing the lens replacement cover
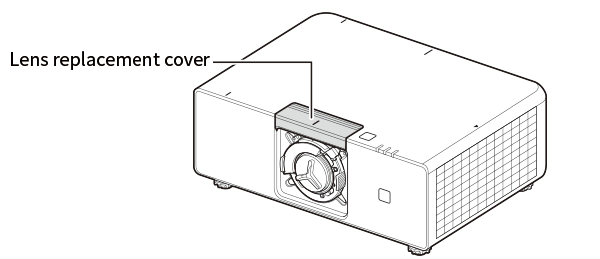
-
While simultaneously pressing the positions indicated by A on the lens replacement cover, pull the cover in direction B.
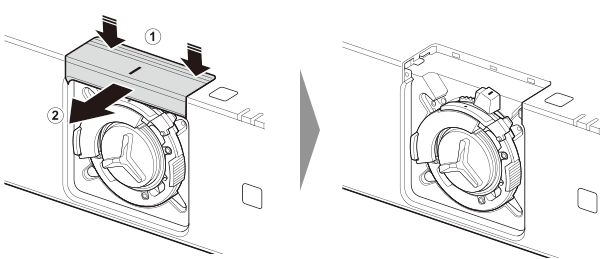
Removing the adapter cap
-
Grasp the lens adapter lever knob from both sides with your fingers.
-
Move the lever in the direction of the arrow until it stops.
-
Pull the adapter cap in the direction of the arrow to remove it.
Loosening the lens adapter fixing screws
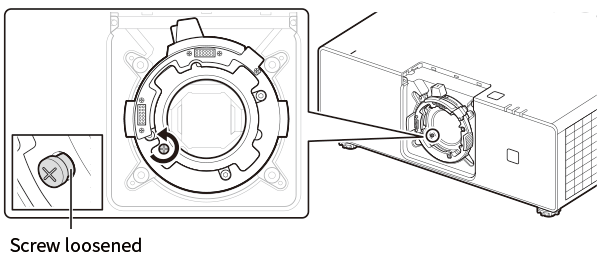
There are three lens adapter fixing screws; the position of the lever must be changed to loosen all of them. Follow the procedure below.
-
Using a screwdriver, turn the screw at the location shown in the figure counterclockwise until it rotates freely.
-
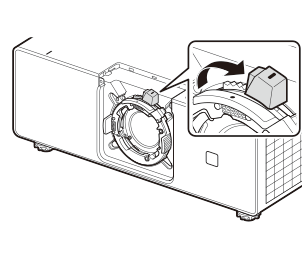
Grasp the lens adapter lever knob from both sides with your fingers and move it in the direction of the arrow until it stops.
-
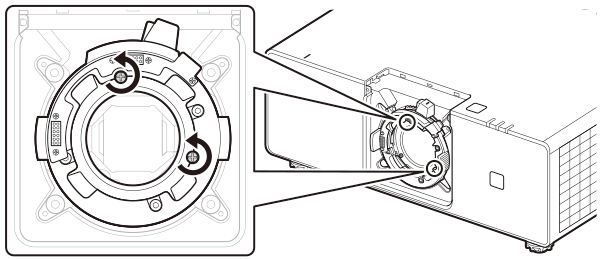
Using a screwdriver, turn the two screws shown in the figure counterclockwise to loosen them until they spin freely.
Removing the lens adapter
-
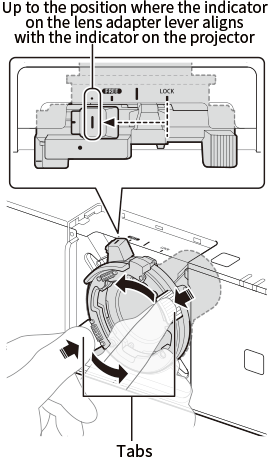
Hold the lens adapter handles with both hands and rotate it counterclockwise (approximately 35 degrees). Rotate the lens adapter lever knob until the index (red line) aligns with the index (red dot) on the projector body.
-
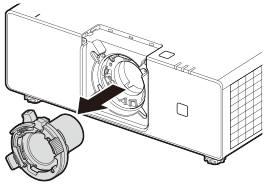
Pull out the lens adapter.
-
Attach the lens replacement cover from the direction of the arrow.
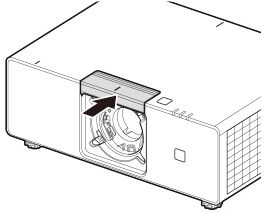
-
If a projection lens is not being installed, attach the body cap to prevent dust entry.