 .
.The Remote Control
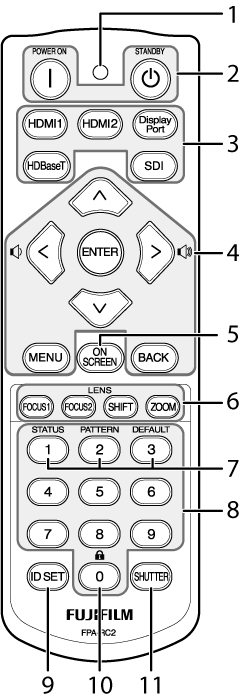
The Remote Control Buttons and Their Functions
The names and functions of the buttons on the remote control are listed below.
| Item | Button | Function | |
|---|---|---|---|
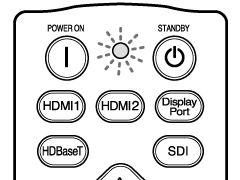
| 1 | Operation lamp | Flashes when buttons on the remote control are pressed. | |
| 2 | POWER ON | Power | Turn the projector on. |
| STANDBY | Switch the projector to standby. | ||
| 3 | HDMI1 | Input | Select HDMI 1. |
| HDMI2 | Select HDMI 2 (FP-Z8000 only). | ||
| DisplayPort | Select DisplayPort. | ||
| HDBaseT | Select HDBaseT. | ||
| SDI | Select SDI. | ||
| 4 | Selector (up, down, left, and right) | Navigate the menus. | |
| Volume (press the selector left and right) | Adjust the volume of the built-in speaker. | ||
| ENTER | Select the highlighted menu item. | ||
| MENU | Display the menus used to adjust projector settings. | ||
| BACK | Return to the previous menu. | ||
| 5 | ON SCREEN | Hide the menus. Press again to view the menus once more. | |
| 6 | FOCUS1 | Lens | Adjust overall focus. |
| FOCUS2 | Adjust focus at the edges of the picture. | ||
| SHIFT | Adjust lens shift. | ||
| ZOOM | Adjust zoom. | ||
| 7 | STATUS | View projector information. | |
| PATTERN | Display a test pattern. To choose the pattern, use the gh keys. | ||
| DEFAULT |
Restore default settings for the selected menu item. This setting can only be adjusted using the remote control. This button cannot be used to reset the following to default values:
|
||
| 8 | 10-key pad | Use when entering the remote control ID. | |
| 9 | ID SET | Display the IDs for the projector and remote control on the screen. | |
| 10 | Remote control lock | Press and hold this button for four seconds to disable remote operation. Be sure to aim the remote at the remote receiver when performing this operation. This setting can only be adjusted using the remote control. | |
| 11 | SHUTTER |
Temporarily suspend projection and mute audio. Press again to resume. After using the shutter, it takes approximately 3 minutes to return to the original brightness. |
|
Remote Control Reception Range
The reception ranges for the projector’s three remote control receivers are as follows:
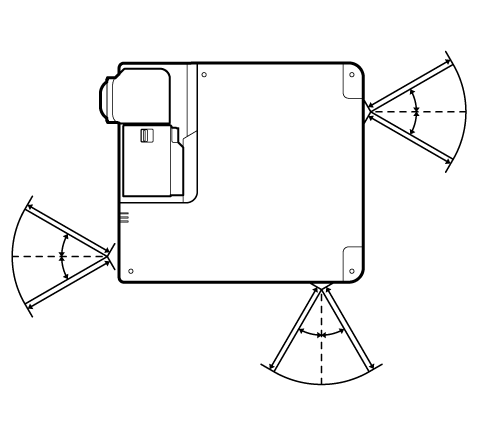
- Angle: ±30°
- Distance: Up to 8 m (26 ft)
Choosing IDs
IDs let you operate multiple projectors, either separately or together, using a single remote control.
Example: Setting the ID to “02”
This example sets the ID to “02”.
-
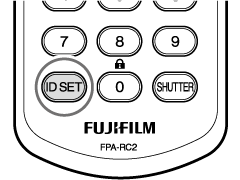
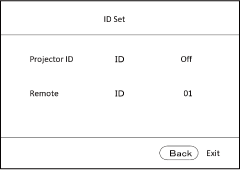
Check the projector and remote control IDs.
Display the IDs by pressing the ID SET button on the remote control.
-
Set the projector ID.
The projector ID defaults to “off”.
-
ASelect Projector ID Setting in the SYSTEM SETUP: Basic menu.
-
BSelect On for Projector ID Setting in the ID selection display. Next, select “02” and press ENTER.
-
-
Set the remote control ID.
The remote control ID defaults to 01.
-
A
 : Press and hold ID SET on the remote control for three seconds.
y The remote control operation lamp will start to flash and the remote control will enter ID input mode. The lamp will continue to flash if the button is released. To return to ID input mode if the lamp stops flashing, indicating that ID input mode has ended, hold ID SET again for three seconds.
-
BPress “0” “2” on the 10-key pad.
-
CPress ENTER.
y The remote control operation lamp will stop flashing.
-
dCAUTION
Once the operation is complete, check that the IDs on the projector and remote control are correct.
bTIP
- Projectors with IDs off can be controlled by remotes with any ID between “01” and “99”.
- Pressing ID SET on the remote control displays the ID even if the projector and remote control IDs are not the same.