 .
.Overview
Spacing
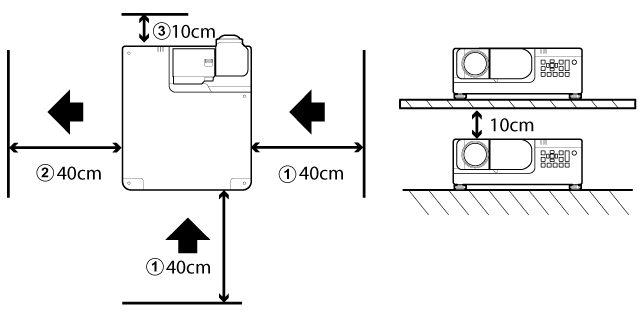
When installing the projector, choose a location where the vents will be a safe distance from walls or other obstructions. When installing units one above another, for example on shelves, leave a distance of no less than approximately 10 cm (0.33 ft) between the shelves and the wall.
A Intake vent: 40cm
B Exhaust vent: 40cm
C Control panel: 10cm
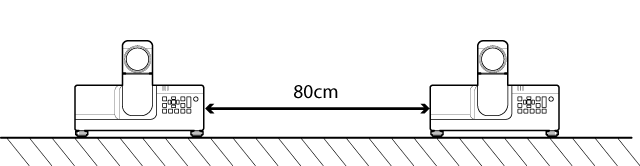
When installing two or more projectors side-by-side, leave a space of at least 80 cm (2.62 ft) between them. You will also need to ensure that the warm air from the exhaust vent does not enter any of the projectors’ intake vents.
dCAUTIONS
- Do not obstruct the vents. The build-up of heat inside the projector could cause fire.
- At high temperatures (over 35 °C (95 °F)), output will gradually drop until Eco(60%) is selected for Light Source Mode, after which any additional use will place the projector on standby. When the projector is turned on after having been allowed to cool, output will be restored to 100%.
- Output may drop at low temperatures, but will recover automatically as the temperature rises.
- Vertical installation is not covered under warranty except for positions that can be selected in the simulator (horizontal, ceiling, and vertical installations). If you must install the projector hung vertically from the ceiling, be sure to contact the manufacturer.
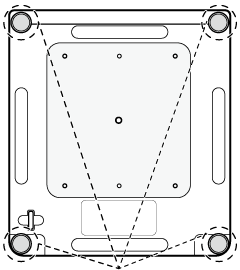
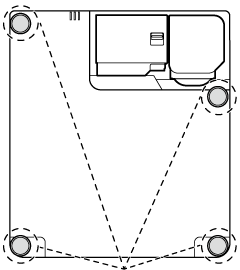
Horizontal installation
Ceiling installation

Vertical installation
Height Adjustment
The height of the projector can be adjusted (by about 2.5 cm) using the adjustable feet. If desired, the feet can be removed and attached to the top of the projector. The projector ships with the feet attached to the bottom.
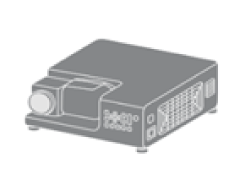
Feet attached to bottom
Adjustable feet
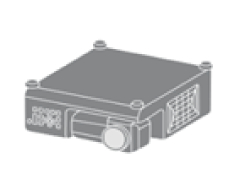
Feet attached to top
Adjustable feet

dCAUTION: SWAPPING THE ADJUSTABLE FEET
To prevent the entry of dust, the projector comes with caps inserted in the attachment points for the adjustable feet on top of the projector. After swapping the feet from the top to the bottom or vice versa, be sure to insert the caps in the unused attachment points to prevent dust entering the projector.
Ceiling Mount Installation Precautions
- When suspending the projector from the ceiling, be sure to use the specified ceiling mount.
- When installing the projector, attach the drop-prevention kit included with the ceiling mount. Refer to your dealer if you require a drop-prevention kit.
- Ceiling installations should be performed only by qualified technicians.
- See the ceiling mount installation instructions for details.
Ceiling Mount Screw Specifications
| Do not remove the screw in the middle. |
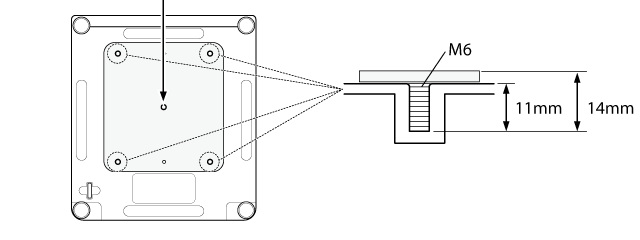
| Bottom | Screw tightening torque: 4.0 ± 0.5 N・m |