 .
.Launch and Setup
dCAUTIONS
- Setup should be performed with the FP-Z8000 connected to the computer running the Warping and Blending Tool.
-
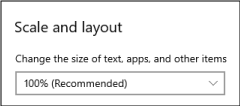
Set the scale of the computer display to 100%. Other settings could prevent access to some parts of the application.
-
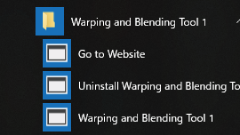
Launch the Warping and Blending Tool on the computer.
-
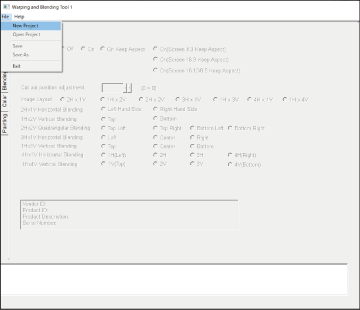
Select New Project in the File menu.
-
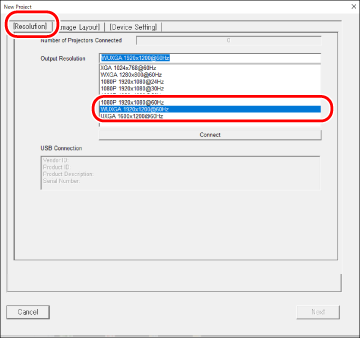
Go to the Resolution tab in the New Project window and choose a resolution. Match the FP-Z8000’s output resolution to the input signal. Once you have chosen a resolution, the content displayed by the projector will switch from an image to a black screen.
dCAUTION
At default settings, the input signal resolution is fixed at 1920 × 1200. Input at resolutions other than the selected value may produce unexpected results.
-
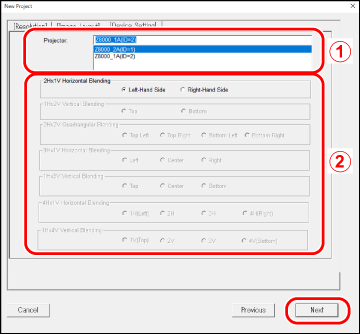
Link to the projectors.
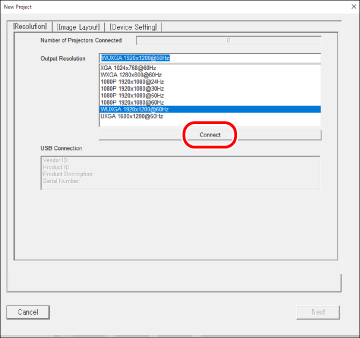
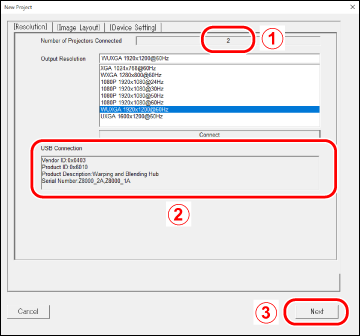
Click Connect and link to the projectors.

-
AThe number of projectors connected.
-
BDevice information for the connected projectors.
-
CClick Next to proceed when settings are complete.
bTIP
With multiple projectors, it may take some time to establish connections after you click Connect.
-
-
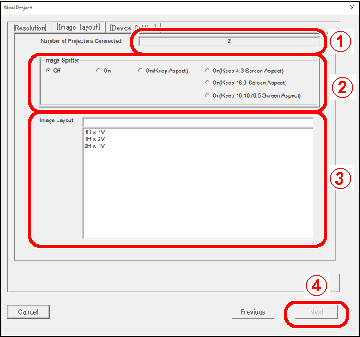
Choose a layout for the projected images.
-
AThe number of projectors connected.
-
BImage Splitter settings.
Enable or disable image splitting using the Warping and Blending Tool.Off Select this option if you intend to split the image by some means other than the Warping and Blending Tool. On Select On to enable image splitting using the Warping and Blending Tool. Images will not be projected at their original aspect ratios but instead at the aspect ratio selected via edge blending. On (KeepAspect) Images are projected at their original aspect ratios. If the input image and screen aspect ratios differ, the left and right or top and bottom edges of the projected image will be cropped to fit the screen (the crop location can be changed using Cut out position adjustment in the Generic tab). On Keep 4:3 Screen Aspect Select this option to project images at the selected screen aspect ratio in cases in which it differs from the aspect ratios of the input images. On Keep 16:9 Screen Aspect On Keep 16:10 Screen Aspect bTIP
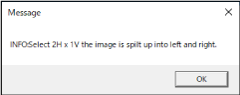
If an option other than Off is selected for Image Splitter, an alert will be displayed notifying you that the image will be split. Click OK.
-
CImage Layout settings.
- Choose a layout for images displayed using two or more FP-Z8000 projectors.
- The dialog lists the layouts available given the number of projectors connected.
Number of projectors Option (“H” = horizontal divisions, “V” = vertical divisions) Image projected 2 2H1V (Horizontal Blending) 
1H2V (Vertical Blending) 
3 3H1V (Horizontal Blending) 
1H3V (Vertical Blending) 
4 4H1V (Horizontal Blending) 
1H4V (Vertical Blending) 
2H2V (Quadrangular Blending) 
bTIP
The layout can be adjusted in the Generic tab.
-
DClick Next to proceed when settings are complete.
-
-
Adjust settings in the Device Setting tab.
Choose the projector used for each segment when displaying images using two or more FP-Z8000 projectors (aImabe Layout).
-
AChoose a projector and click Next.
-
BChoose the segment displayed by the selected projector and click Next.
bTIPS
- If you are using only one projector, the only option available will be 1H*1V and the start dialog will be displayed.
-
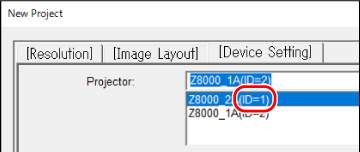
The projector ID shown in the dialog is projected on the screen.
-
-
When settings are complete, the following dialog will be displayed, opened to the Generic tab.
The settings selected in the preceding steps will be displayed and can be adjusted as desired.
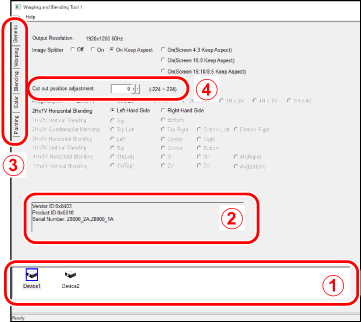
-
ASelect the projector before adjusting settings. Any changes will apply only to the selected FP-Z8000 projector. Selecting an FP-Z8000 displays the projector’s ID (1 through 4) on the screen.
-
BThe selected projector’s ID.
-
CSelect tabs (Warping, Blending, Color, or Painting) and adjust settings.
-
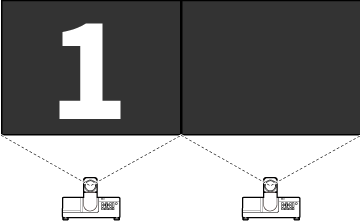
DCut out position adjustment: Choose where source information is displayed. Choose vertical and horizontal offsets, in pixels. Changes apply to both Device 1 and Device 2. Changes apply to all connected projectors.
In the following example, the source information is offset vertically by the amount selected for Cut out position adjustment but is not offset horizontally (the projected image is also offset, and this also applies when the information is offset horizontally).

-