 .
.Painting
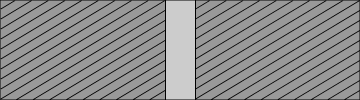
Adjust black levels for all parts of the picture other than the blended areas at the joins between the component images. The black levels for the rest of the picture should match those at the joins. When adjusting black, select Enable Black in the Image Warping tab to project a solid black image onto the screen.
-
Start: The shaded areas require adjustment.
-
Painting: Black levels are adjusted to match the join.

-
End: The join is less visible.

bTIP
The effects of painting may not be visible depending on projector brightness.
-
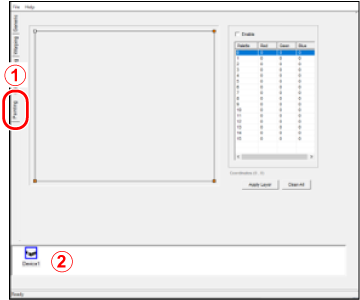
Click the Painting tab to display painting options (A) and choose a projector to which painting will be applied (B).
-
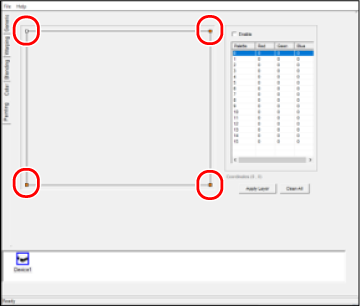
Choose an area for painting.
Keeping your eye on the projected image, select the area you want to edit as defined by its four corners.
Drag the mouse or use the arrow keys on the keyboard to position the selected corner, shown in blue.
-
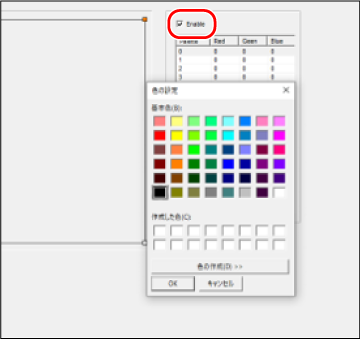
Select Enable and click the first of the selected areas to display a color palette.
Choose a color, click OK, and click Apply Layer to apply the color to the image displayed by the projector.
Repeat Steps 2 and 3 to adjust settings as desired for the remaining areas of the image.