 .
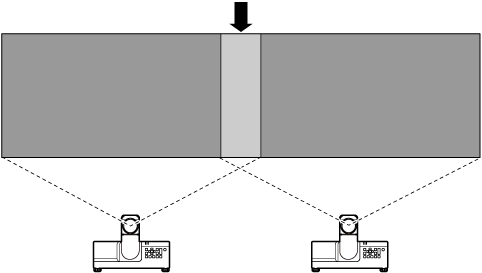
.Blending (Edge Blending)
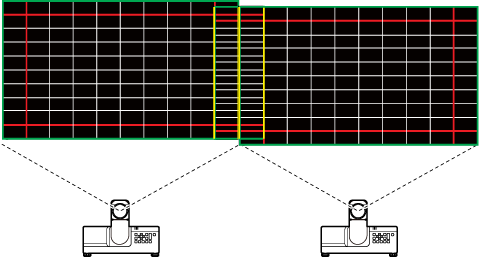
Smooth the edges between the component images from each projector, seamlessly blending them into a single picture.
Joins become less obvious.
Follow the steps below.
-
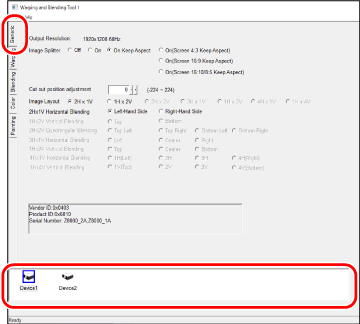
In the Generic tab, select the projector to which settings will be applied.
-
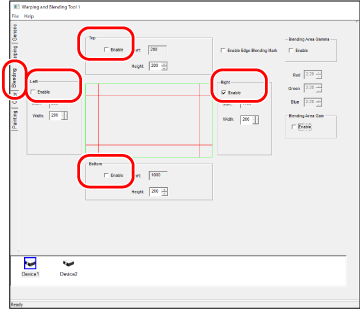
In the Blending tab, place checks in the Enable check boxes for the portions of the images to which you wish blending to apply and adjust settings as desired.
The check boxes are enabled automatically when you choose a device.
bTIP
Use warping for fine adjustments to overlaps.
-
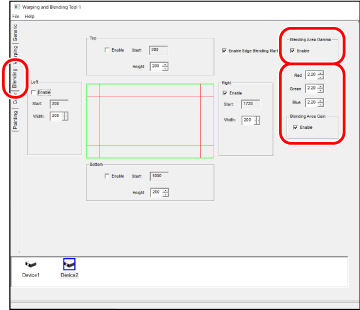
In the Blending tab, select Enable for blending area gamma and gain.
Blending Options
Selecting the Blending tab displays (edge) blending options.
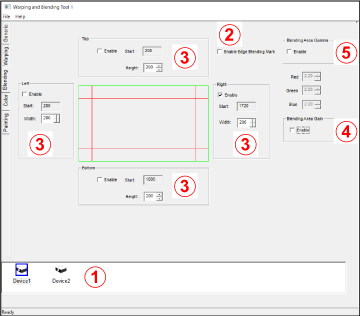
| A | Select a projector. |
|---|---|
| B |
Enable Edge Blending Mark: Select this option to display marks showing the overlap between the images from two projectors. When the blending areas are precisely matched, the red and green lines will blend together, turning yellow.
|
| C |
Top, Left, Right, and Bottom: Choose the areas to which edge blending applies.
The width and height of each join can be from 16 to 512 pixels. Enter values directly or choose a values using the left and right buttons. The widths of the left and right joins are always the same, as are the heights of the top and bottom joins. Before using blending with three or more projectors, position of the projected images appropriately. |
| D | Blending Area Gain: Select this option to apply gradations to the joins. |
| E | Blending Area Gamma: Select this option to adjust the color of the joins. Enter values for gamma of from 0.3 to 3.00. Press ENTER after entering values for each of Red, Green, and Blue. |
bTIP
You normally will need to enable both Blending Area Gain (D) and Blending Area Gamma (E). Red, green, and blue can be fine-tuned as necessary.